ELECTRICAL CIRCUITS
For this task, you received a kit that contains materials you will use to perform investigations and solve a mystery during the next 40 minutes.
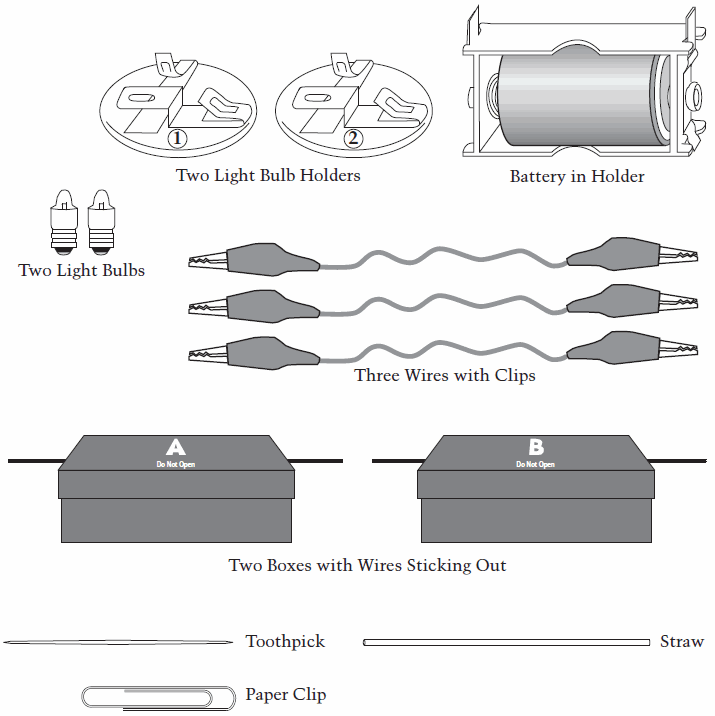
Please open your kit now, take all of the things out of the bag, and put them on your desk. Use Diagram 1 to check that all of the materials in the diagram are included in your kit. If any materials are missing, raise your hand, and someone will provide you with the materials you need.
Diagram 1

DO NOT USE THE MATERIALS OR READ ANY FURTHER UNTIL THE ADMINISTRATOR TELLS YOU TO DO SO.
In this task you will perform investigations using electrical circuits. At the end of this task, you will use what you have learned to solve a mystery about a hidden light bulb.
This task contains the following four parts:
Part 1: Learning to Assemble an Electrical Circuit
Part 2: Designing Your Own Circuit
Part 3: Designing a Different Circuit
Part 4: Investigating Unknown Boxes
You will be scored on how well you
- design your investigations,
- record your observations, and
- answer questions based on your investigations and your knowledge about electrical circuits.
Follow the directions on each page and write your answers to the questions in the spaces provided in your booklet.
You will now place the light bulbs in their holders.
Take the light bulb holder labeled 1. Place one of the light bulbs into the holder. Twist the bulb until its bottom touches the bottom metal part of the holder as shown in Diagram 2.
Take the light bulb holder labeled 2. Place the other light bulb into the holder. Twist the bulb until its bottom touches the bottom metal part of the holder as shown in Diagram 2.
Diagram 2

Holder 1 and its light bulb will be called Bulb 1.
Holder 2 and its light bulb will be called Bulb 2.
Make sure you keep the light bulbs in their holders for the rest of the task.
You will now learn how to use the clips at the end of the wires.
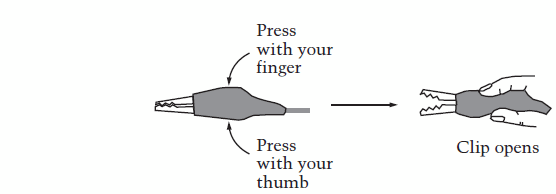
Take one of the wires with clips at the end. If you press down on the wide part of the clip, the clip will open, as shown in Diagram 3 below. You can then clip the wire onto things. If the black cover of the clip slips off, raise your hand, and you will be given a new wire with clips.
Diagram 3
